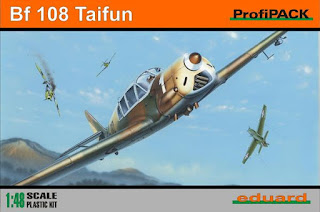
The kit looks classic Eduard, nicely moulded parts in their usual olive brown plastic, and accompanied with a nice photo etch fret full of details and that most welcome of sights, a pre cut window mask set.
And so to business. The cockpit tub builds up nicely, incorporating the two pilot seats and a rear bench seat for passengers that scrubbed up well in leather brown and a little dry brushing to accentuate the shape. The control columns are well formed and with the addition of the etched seat belts the whole package looks really rather good for relatively little effort. That is, apart for the rather painful process (as usual) of gluing together Eduards overly complex seat belt arrangement from the tiniest parts.
Unlike most kits, the cockpit fits in after the fuselage halves go together, which is nice, because it allows you to get the body in one pieces and all sanded and de-seamed without worrying about damaging the cockpit details. A very slight warp in one half did cause a little fun getting everything lined up at this point but nothing too problematic. However when the cockpit tub is inserted it became clear that the shape of the fuselage was not quite right, being a little too tall to match the cockpit shape. Before glueing in place I test fitted the canopy part and this confirmed the problem. So some clamping was required whilst the cockpit glue cured to "squash" the fuselage vertically somewhat to ensure that a smooth result would be obtained once the canopy section was added.
Adding the wings also needed a little shaving underneath the cockpit to get a good fit, and even then a little filler is needed to properly close up the seams around the wing roots. The top sections of the wings also did not line up perfectly so a little sanding was needed to get them smooth as well. Next I masked up the canopy using the mask set. Once in place, there was still a slight ridge between the canopy piece and the fuselage body, so a bit of work was needed to get this smooth as well.
 Painting started with a coat of Tamiya fine primer to get the surface smooth and consistent. This was followed by RLM76 on the underside. I masked this off, which is fortunately easy on this colour scheme, and applied RLM71 across the top. The splinter scheme was then masked and a final coat of RLM70 applied. However, once done, I suffered the problem that blights so many Luftwaffe modellers. RLM70/71 camouflage schemes are very common and very easy to get into difficulties with. The problem is that these colours, according to most references, are actually very similar (although for some reason the Eduard instructions represent RLM71 as a sort of dark brown, which is completely wrong) and the splinter pattern can be very difficult to distinguish visually. This never looks right to me, perhaps is a scale thing. So I lightened the RLM71 with some light grey and went back over it. This gave a much better contrast and looks more like the real thing to me as well.
After a coat of gloss, the decals went on with little fuss. Very little stencilling is provided, although not much is needed, but the size of the decals as shown on the instructions did not match up with the real thing in many instances so some creativity was needed. The remaining gloss, oil wash and matt finish was without incident. I topped her off with a little post shading and bleaching to break up the smoothness a bit.
I found the installation of the undercarriage a little tricky. The tail wheel strut is far too long and needed trimming, and the main wheels refused to line up properly without a lot of persuasion and fixing in place with tape whilst they dried. A couple of minor surface details later and she was done.
This is a good kit from Eduard, although one cant help the feeling that it was a little rushed on their part - there are some small inconsistencies between the instructions and the moulds, and as pointed out the shape of the fuselage needs a little squashing to get things right. But the end result is a nice representation of this important aircraft. I will not be in a hurry to do another one now I have finally built it - but I am glad I did.
www.bowemodels.com


No comments:
Post a Comment