www.bowemodels.com
Well here's a plane that gets most enthusiast's juices flowing. And in a nice big 48th scale option as well. And it is BIG. Most have some knowledge of this sadly defunct aviation project - killed off by political machinations more than anything else, but what could have been is rather exciting. And what a looker! Would not look out of place coming out of Skunk Works today, but back in the 60s this was something extraordinary.

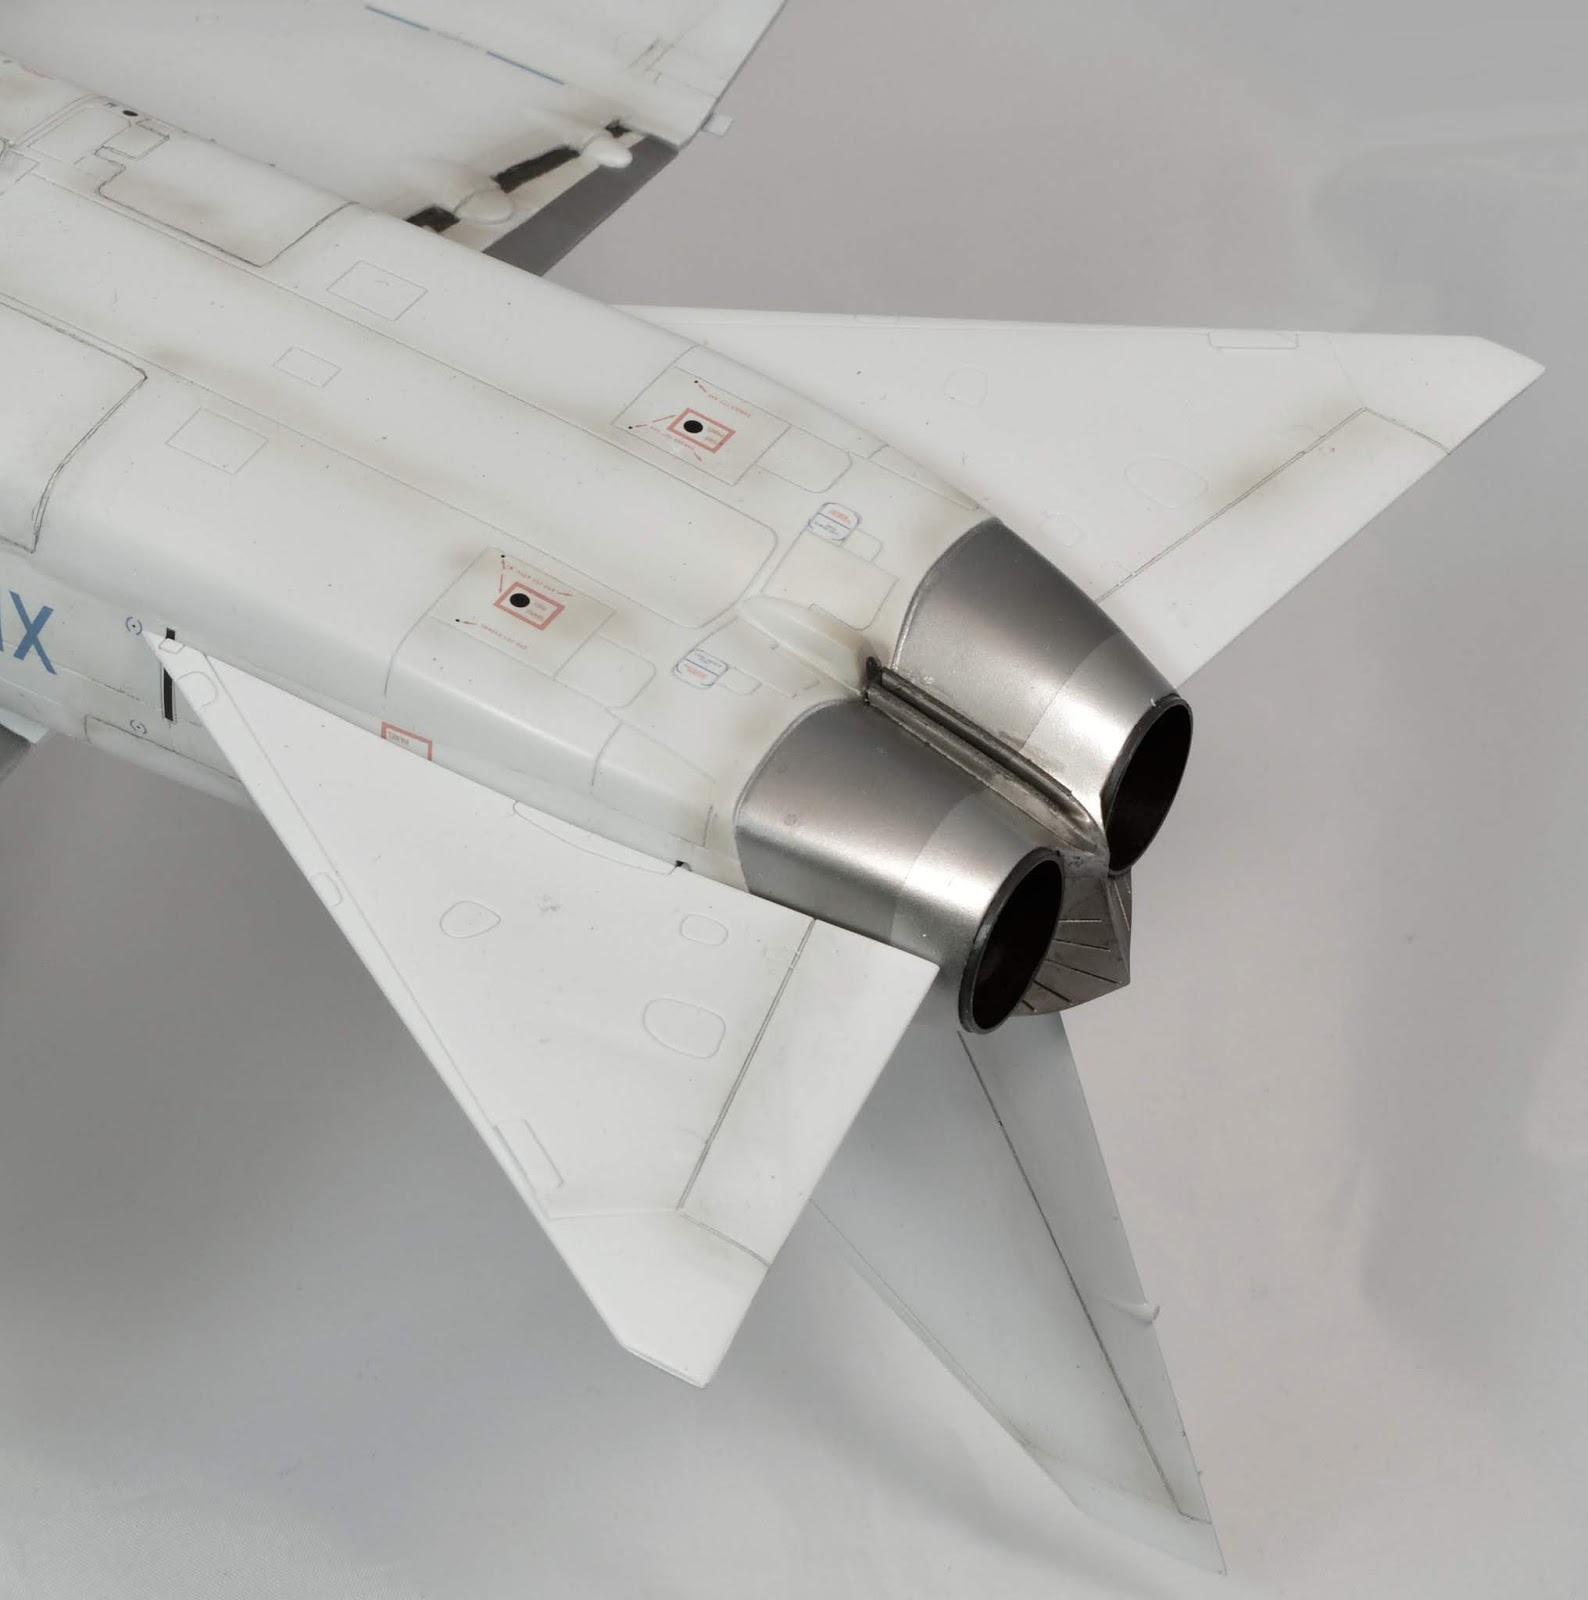
Airfix first pushed out a 1/72 scale TSR-2 in 2006 and followed it with this bigger version in 2009. Now - that is relatively recent in the grand history of plastic kits, but I have to say there is definitely something a bit primitive and early 80s about it, and to be brutally honest I would have expected something a little more refined from a kit of recent vintage. A relatively small parts count, thick plastic, some chunky indistinct mouldings and that terror of Airfix kits at the time (and many since), deep wide panel lines (trenches?) that you could lose your modelling knife in. Looks like it is simply an upscale of the 1/72 kit, however the word on the street is that this was designed as 1/48 initially and down scaled for the initial 1/72 version.

But on the upside, the parts fit together very well, it is pretty accurate (with one big exception) and makes for one hell of an imposing model. The main accuracy problem is the canopy. The pilots windows are too big, too square and the canopy profile is too flat. The operators section canopy is passable, but the big elephant in the room is the forward windshield. Not only is the middle windscreen panel flared in shape (should be rectangular) but even more annoyingly it doesn't fit on the fuselage. It sinks too low and leaves a large "lip" in front of it. This is surprisingly tricky to fix and yet still maintain the correct overall profile. I have to say, this is unforgivable. If you look around you can find some enterprising modellers who have come up with solutions, mostly involving packing under the sills but I couldn't be doing with that so I bought in the CMK vac form replacement which is accurate, and also fits the Airfix fuselage correctly. I am not generally a fan of vac canopies but sometimes you've just got to do it.

I also bought in the CMK cockpit set, which provides a nicely moulded replacement tub. It also fixes the other main bugbear of the Airfix kit, which is the ridiculously tall instrument panel coming (HUD area) which appear to not allow the pilot to see forward. Other cockpit sets are available, and in some ways I wish I had bought one of them to be honest. The CMK one is well moulded and does seem to represent the TSR-2 cockpit well, but doesn't bear much relation to it's own instruction diagrams (or the photo on the box it came in). Therefore much guesswork and trial and error was needed to fit it together and, indeed, into the Airfix fuselage. But I got there in the end and was pretty happy with the result.

My customer wanted everything closed to properly appreciate the graceful lines of this beast. However given the lovely detail in the cockpit I initially resolved to put the canopies on "loose", i.e.could be removed to view the interior. Unfortunately, despite much effort, I could just not get an acceptable lack of seam around the canopy areas (not the CMK vac form's fault, but you never get a perfect fit with vac form as you have to cut it out yourself) and so we agreed to seal them on. However, once finished it is surprising how much of the cockpit detail can be seen anyway, so not all that effort was wasted.

As per my customers wishes, all panels, air brakes and bomb bay were sealed closed. If you want to show them open, you WILL need some aftermarket help. Although I have to say the central wheel bays are a pretty good effort by Airfix. Effort that is sadly lacking in other areas unfortunately.
Interestingly, this is one of the few jet models that doesn't need any nose weight! This is thanks to the sheer length of the forward section the centre of gravity is well forward of the main wheels.
Once everything was together, I primed and painted all over in white. The kit decals are pretty good, maybe lacking some of the finer stencils but they worked well for me.

One problem with an all white model, to my mind, it that it looks boring. And I refused to apply a panel wash as I usually would in this scale, because those panel lines are so intrusive I didn't want to highlight them further and it would probably have ended up looking like a cheap diecast. However I gently outlined the key control surfaces and movable panels with pencil to add a little interest. What's more, photos of the original XR219 showed that it did get weathered a bit, even if only as a result of test flights. So I duly applied a fair amount of weathering until I was satisfied that it looked more like the real aircraft.

I dressed up the undercarriage with bits from my spares drawer and some brake lines. I used the SAC metal undercarriage set because this is a big model and the extra strength is recommended. SAC legs are great for strength but contrary to popular opinion they very rarely add any detail. They are simply duplicate moulds of the kit parts, mould seam lines and all (really guys? you could make a little effort please), and in this case came with a lot of extra flash that needed removing. The kit (or SAC) parts aren't actually that bad detail wise (with the exception of the calipers which are terrible - I replaced them with spare etch), but the TSR-2 undercarriage is particularly complex and will always benefit from some enhancement. I did try to get hold of some after market help here but none could be located, most sets for this kit are simply no longer available.
So that's pretty much it, all the problems listed here don't in any way detract from the pleasure I had in putting together such a fine model of such an astonishingly striking aircraft, and all credit to Airfix for releasing this kit, despite a few schoolboy errors in it's design.
I hope you enjoy the end result!

 My instant reaction to the kit parts was that the heavy, solid wings appeared to be a bit much for the relatively flimsy two fuselage halves. Being resin, too much strain would potentially be disastrous so my first resolve would to strengthen the fuselage with some struts.
 The cockpit tub went together pretty well, fitting the instrument panel was less precise, and took some messing about but I got it to an acceptable state in the end. Planet provide a few nice etched details, including reasonable belts so I installed and painted these. Not too much effort was spent as things won't be that visible.
 We now move on to the one major flaw in this kit. The wings are dead flat, and this is wrong. The aircraft should have a 3-4 degree upwards dihedral on the tip sections. Indeed, this is obvious from the cover picture on the box, but Planet seem to have completely ignored this. Unfortunately this was too much for my neurotic brain so I chopped the end of the wings, drilled some pin holes and re-connected them at the correct angle. After a lot of filling and smoothing this seemed to have worked.
 The Welkin had, as far as can be ascertained from the limited references available, a fairly complex rear canopy sliding structure and although Planet have provided etched canopy supports, the underlying mechanism is not represented. So, admittedly using a little artistic licence, and based on the best references I could fine, I cobbled it together from spare etched brass.
 The customer asked for the medium sea grey scheme of DX289 ZQ-V, which has a PRU blue underside. Planet provide decent enough decals, virtually no stencilling of course, and the decals were a little delicate but went on well.